
Hi!
The Raspberry Pi 4 is an amazing device, and if you have been tracking the different usage scenarios for the device, you probably noticed that heat is an issue. I’ve using some Aluminum Heatsink, however still in some heavy scenarios the device temperature can be up to 70C or more.
I found out that when the device get’s to certain temperature (>80C), the device lowers its operational speed to prevent damage.
Officially, the Raspberry Pi Foundation recommends that the temperature of your Raspberry Pi device should be below 85 degrees Celsius for it to work properly. That’s the maximum limit. But it would start throttling at 82 degrees Celsius.
Raspberry Pi Temperature Monitor
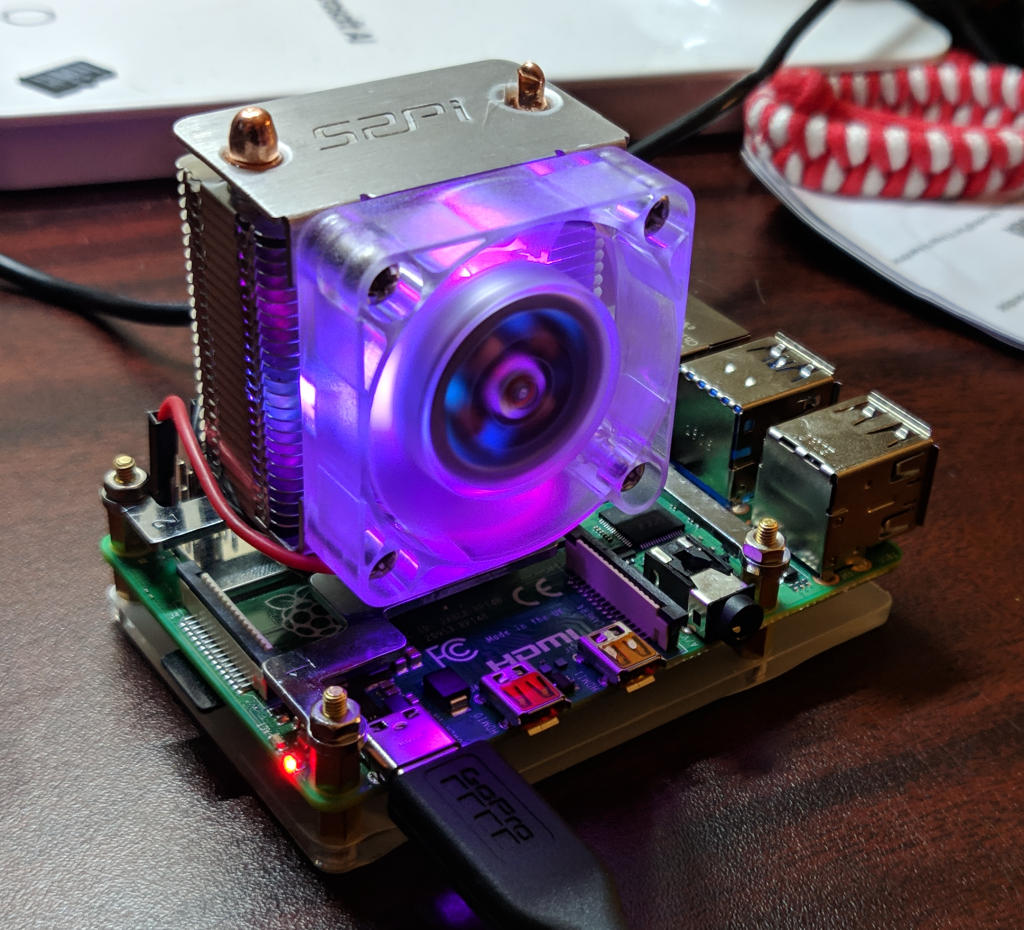
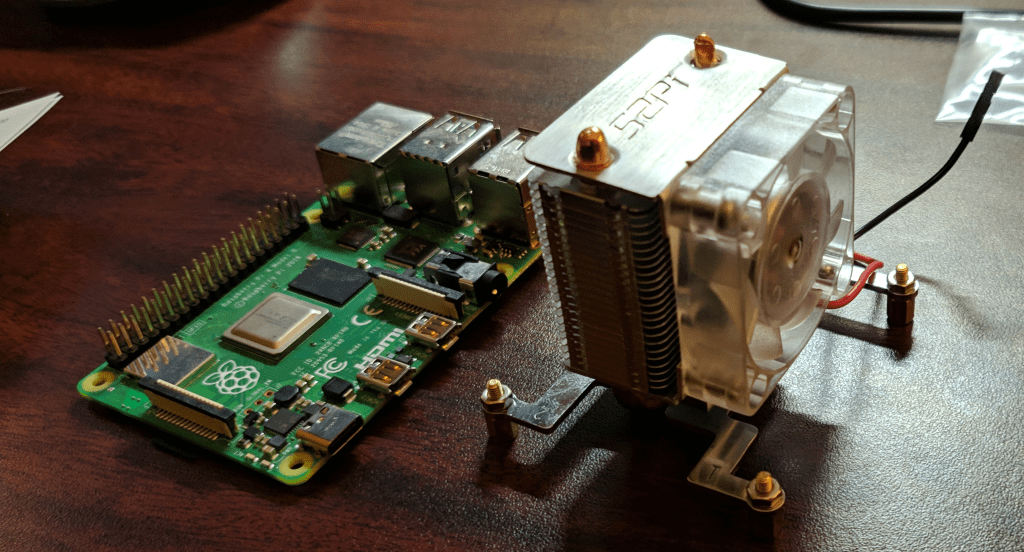
While I was digging on this topic, the SeeedStudio team approached me to suggest me to test one of the best fans for Raspberri Pi 4: Blink Blink ICE Tower CPU Cooling Fan for Raspberry Pi (Support Pi 4).
This fan is massive and amazing. Look at these photos, to have a sense of the size of the fan.
And, because I’m a programmer, I decided to test the device temperature with a long heavy process, to see how this affect the temperature.
Build OpenCV
Initially I was planning to share a machine learning training model process, but then I realized that there is something else that we can do which is very resource consuming: Compile OpenCV.
And, I know, you can install OpenCV with a simple pip install command, but let’s built it. Is much more fun. As usual, I’ll rely on one of the amazing Adrian Rosebrock Tutorials: Install OpenCV 4 on Raspberry Pi 4 and Raspbian Buster (see references)
Build OpenCV using 4 cores with a bare naked Raspberry Pi: >75C
In this 1st scenario, I built OpenCV using the 4 cores with a bare-naked Raspberry Pi. This process took almost an hour, and as you can see in the following animation:
- The 4 cores where working at 100%
- The temperature was around 75 degrees all the time
- And, of course, this animation is at 300X speed.

Build OpenCV using 4 cores with ICE Tower Cooler fan in a Raspberry Pi: <40C
In the 2nd scenario, I built OpenCV using 4 cores with the ICE Tower Cooler fan in the Raspberry Pi. As the previous one, this process also took almost an hour, and as you can see in the following animation:
- The 4 cores where also working at 100%
- The temperature was less than 40C degrees all the time
- Again, this animation is at 300X speed.
Differences running an App: Face Recognition
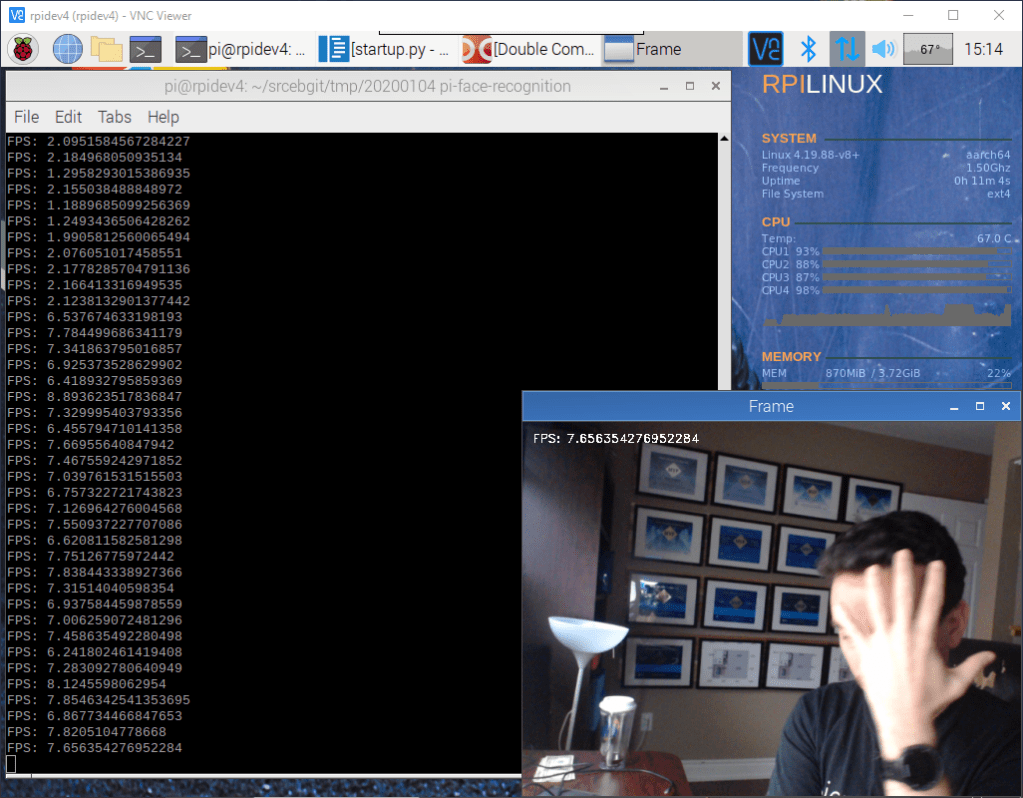
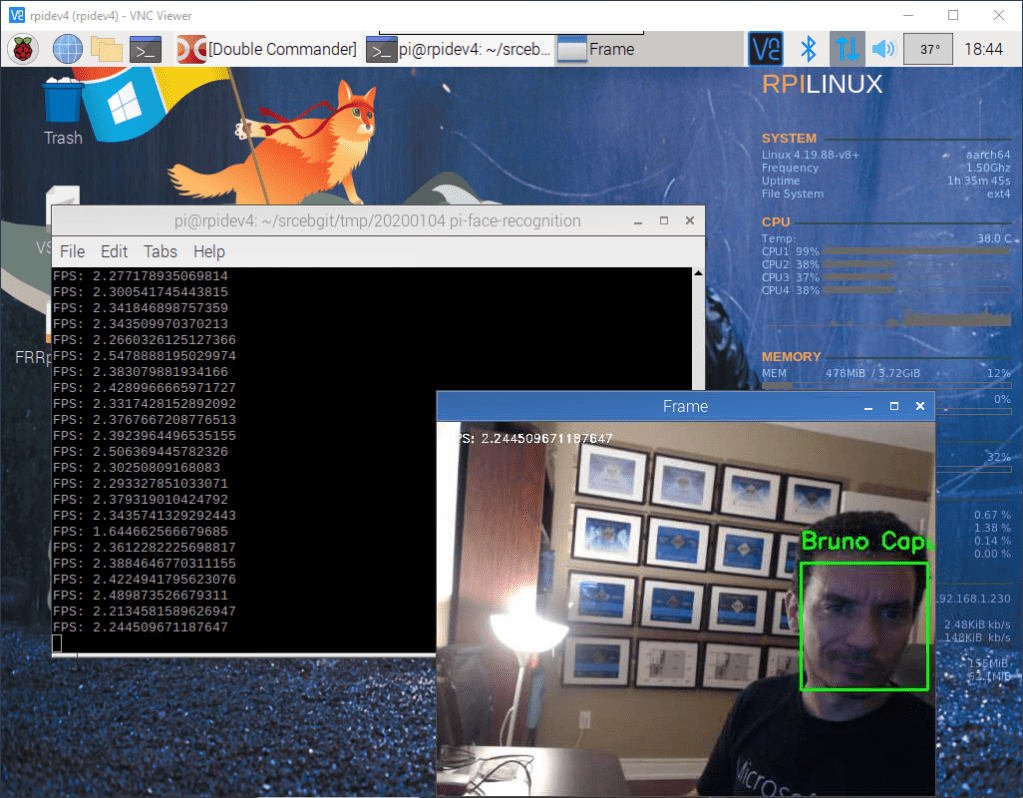
My next question was how about a normal process, like some face recognition demos. I used and changed some of Adrian Rosebrock’s face recognition demos, and here are the results.
Face Recognition app in a Raspberry Pi bare-naked, runs at 67C degrees
Face Recognition app in a Raspberry Pi with ICE Tower Cooler fan, runs at 38C degrees
Conclusion
If you are concerned about the temperature of your device, this is my top 1 option. And, if you are wondering if the fan is noisy? not at all! I have it right next to me, and I don’t even notice the fan.
About Seeed Studio
Seeed is the IoT hardware enabler providing services over 10 years that empower makers to realize their projects and products. Seeed offers a wide array of hardware platforms and sensor modules ready to be integrated with existing IoT platforms and one-stop PCB fabrication and PCB assembly service. Seeed Studio provides a wide selection of electronic parts including Arduino Raspberry Pi and many different development board platforms Especially the Grove Sytsem help engineers and makers to avoid jumper wires problems. Seeed Studio has developed more than 280 Grove modules covering a wide range of applications that can fulfill a variety of needs.
Bonus: this video also analyzes the cooler in other scenarios.
Happy coding!
Greetings @ Burlington
El Bruno
References
- Raspberry Pi Temperature Monitor
- Blink Blink ICE Tower CPU Cooling Fan for Raspberry Pi (Support Pi 4)
- Install OpenCV 4 on Raspberry Pi 4 and Raspbian Buster
- GitHub, OpenCV https://github.com/opencv/opencv
My posts on Raspberry Pi ⚡🐲⚡
Dev posts for Raspberry Pi
- How to grant permissions to a folder after git clone, to perform dotnet restore on a Raspberry Pi
- How to install .Net Core 3.1 in a Raspberry Pi 4
- Installing Visual Studio Code in a Raspberry Pi 4, run as root, fix black screen
- How to install .Net Core in a Raspberry Pi 4 and test with Hello World
- Build and Run C# NetCore projects in a Raspberry Pi 4 with Visual Studio Code
- Let’s do some Git dev in Raspberry Pi 4 (GitHub and Azure DevOps!)
- Install OpenCV
- Install Python 🐍 Virtual Environments in Raspberry Pi
- Setup SSH passwordless access to remote work with Docker 🐳
- Manage Docker 🐳 as a non-root user
- Build Docker 🐳 images from Visual Studio Code remotely using a Raspberry Pi
Tools and Apps for Raspberry Pi
- Where is my Task Manager in RaspberryPi? Let’s try htop
- Multi-monitor 📺 in Raspberry Pi 4 rocks !
- Double Commander on RaspberryPi4, because files are important
- How to install Docker 🐳 in a Raspberry Pi 4
- Installing Visual Studio Code in a Raspberry Pi
- Installing Visual Studio Code in a Raspberry Pi, run as root, fix black screen (Updated)
- 6 commands to install OpenCV for Python 🐍 in a Raspberry Pi 4
Setup the device
- 1st Setup without monitor 📺: auto connect to WiFi 📶, enable SSH, update and more
- Setup without monitor: enable VNC
- How to enable auto start with HDMI safe mode
- Running a Python 🐍 script in a Python Virtual Environment on reboot / startup
- Setup Wifi on Ubuntu

Leave a comment