
Hi!
TL;DR: These 2 commands are the only ones you need to install
wget https://packagecloud.io/headmelted/codebuilds/gpgkey -O - | sudo apt-key add –
curl -L https://code.headmelted.com/installers/apt.sh | sudo bash
At the bottom of the post you will also find the command to run Visual Studio Code as Root in RPI
Some history on installing VSCode in a Raspberry Pi
Now that I have my amazing Raspberry Pi 4 with 4GB RAM, it’s time to see how serious the device is. So, I decided to install and use some developers’ tools in the RPi. My dev list will be something like this
- Python
- Some ML and AI Python packages
- GIT
- Arduino
- Visual Studio Code
It’s been a while since I installed VSCode in the device. The last time I did this, I needed to download the code from GitHub and compile the tool in the Raspberry Pi. As far as I remember this was a +25 min process.
Lucky for us the process can now be much simpler, thanks to Headmelted (see references). Now, we only need a single command to install VSCode:
. <( wget -O - https://code.headmelted.com/installers/apt.sh )
Install process started! Or Maybe not because I found this amazing GPG error
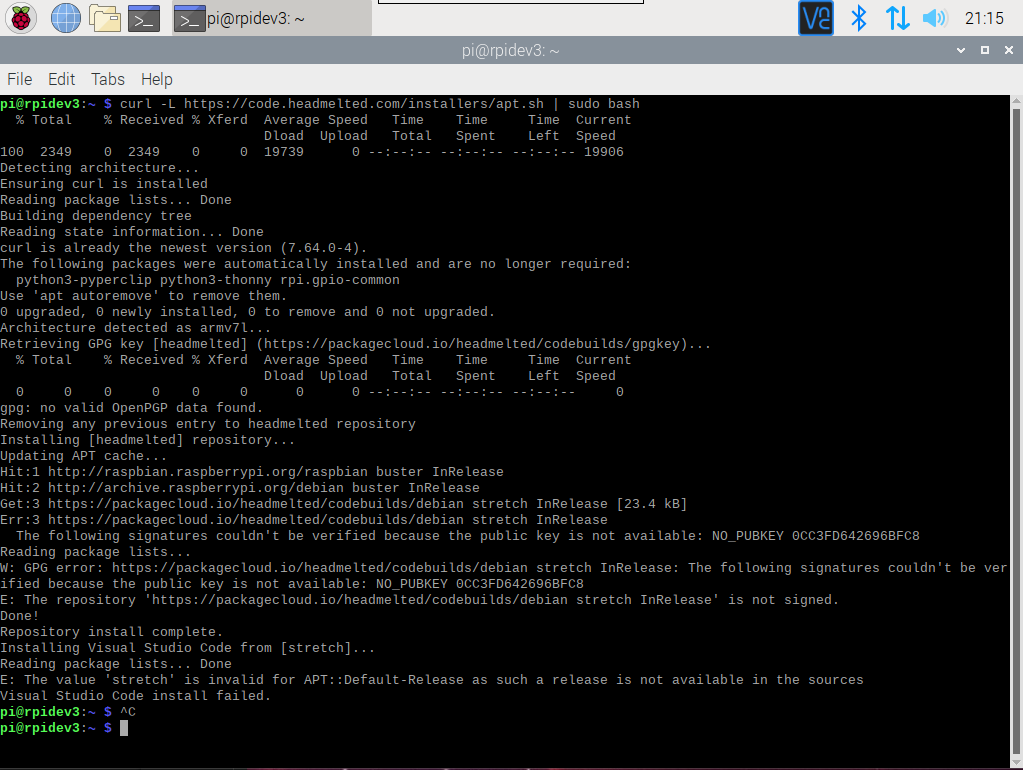
pi@rpidev3:~ $ curl -L https://code.headmelted.com/installers/apt.sh | sudo bash
   % Total    % Received % Xferd  Average Speed   Time    Time     Time  Current
                                  Dload  Upload   Total   Spent    Left  Speed
 100  2349    0  2349    0     0  19739      0 --:--:-- --:--:-- --:--:-- 19906
 Detecting architecture…
 Ensuring curl is installed
 Reading package lists… Done
 Building dependency tree
 Reading state information… Done
 curl is already the newest version (7.64.0-4).
 The following packages were automatically installed and are no longer required:
   python3-pyperclip python3-thonny rpi.gpio-common
 Use 'apt autoremove' to remove them.
 0 upgraded, 0 newly installed, 0 to remove and 0 not upgraded.
 Architecture detected as armv7l…
 Retrieving GPG key headmelted…
   % Total    % Received % Xferd  Average Speed   Time    Time     Time  Current
                                  Dload  Upload   Total   Spent    Left  Speed
   0     0    0     0    0     0      0      0 --:--:-- --:--:-- --:--:--     0
 gpg: no valid OpenPGP data found.
 Removing any previous entry to headmelted repository
 Installing [headmelted] repository…
 Updating APT cache…
 Hit:1 http://raspbian.raspberrypi.org/raspbian buster InRelease
 Hit:2 http://archive.raspberrypi.org/debian buster InRelease
 Get:3 https://packagecloud.io/headmelted/codebuilds/debian stretch InRelease [23.4 kB]
 Err:3 https://packagecloud.io/headmelted/codebuilds/debian stretch InRelease
   The following signatures couldn't be verified because the public key is not available: NO_PUBKEY 0CC3FD642696BFC8
 Reading package lists…
 W: GPG error: https://packagecloud.io/headmelted/codebuilds/debian stretch InRelease: The following signatures couldn't be verified because the public key is not available: NO_PUBKEY 0CC3FD642696BFC8
 E: The repository 'https://packagecloud.io/headmelted/codebuilds/debian stretch InRelease' is not signed.
 Done!
 Repository install complete.
 Installing Visual Studio Code from [stretch]…
 Reading package lists… Done
 E: The value 'stretch' is invalid for APT::Default-Release as such a release is not available in the sources
 Visual Studio Code install failed.
There a public GPG key used to verify the package and the SH script somehow does not download it (I think the ARM RPI version is still not defined). So, before the previous command, I need to run this command
wget https://packagecloud.io/headmelted/codebuilds/gpgkey -O - | sudo apt-key add –
Then run this command
curl -L https://code.headmelted.com/installers/apt.sh | sudo bash
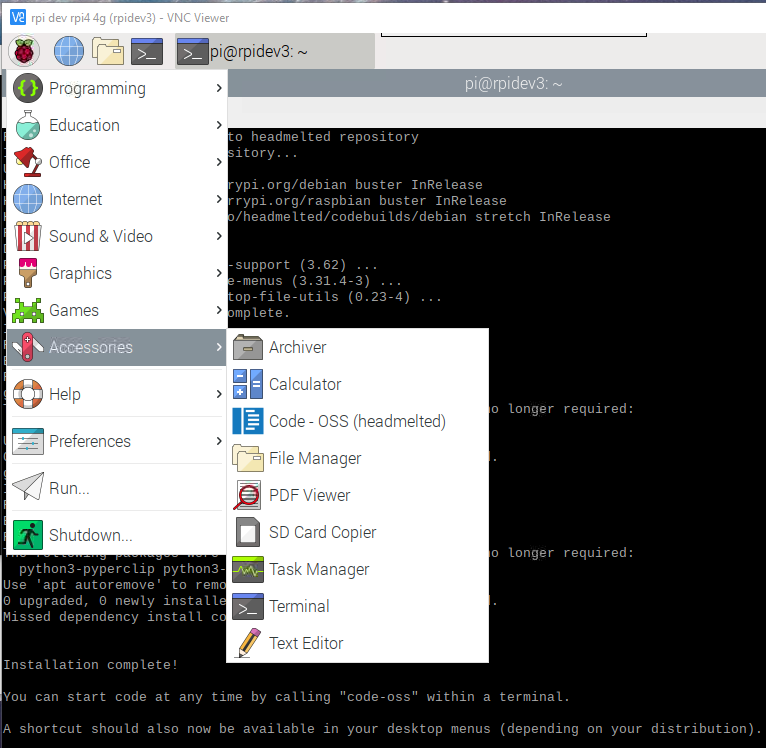
Now we have Visual Studio Code installed!
Old Issue, not needed since 2020 January
But, yes another but, you may note that the tool open and display a black window. Again, I need to go deeper on the details, but the latest version does not work well. There is some context information on GitHub (see references), and the proposed solution is to rollback to a previous version
sudo apt-get install code-oss=1.29.0-1539702286
And we also need to disable the automatic updates on this tool
sudo apt-mark hold code-oss
The following command will remove the hold for Visual Studio Code
sudo apt-mark unhold code-oss
And now, yes, we got a fully functional Visual Studio Code in our Raspberry Pi!
How to run VSCode as root
Another update, is a command to run VSCode as root
# open VSCode in default source code folder with root
sudo code-oss --user-data-dir=/home/pi/src/vsCodeUsrData
Of course this is not the best way to use Visual Studio Code, however something it helps 😀
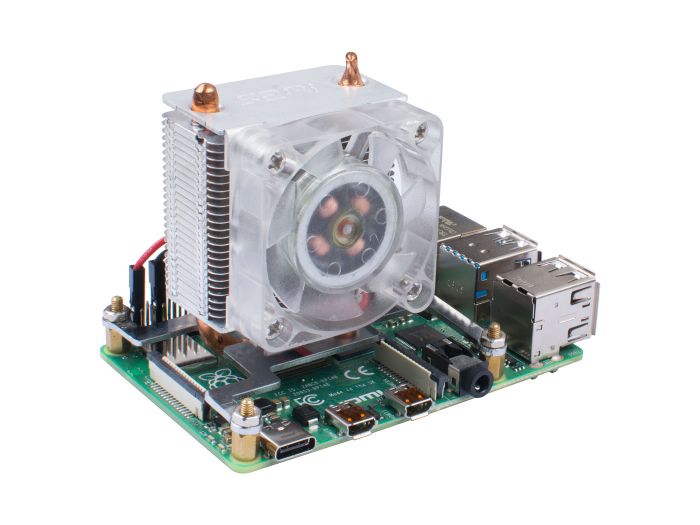
Note: Due some Deep Neural Network and docker process, my device is starting to heat a lot, so I’ll try a next generation cooler like this one: Blink Blink ICE Tower CPU Cooling Fan for Raspberry Pi (Support Pi 4)
Happy Coding!
Greetings @ Toronto
El Bruno
References
- Headmelted, Community Builds for Visual Studio Code https://code.headmelted.com/
- Jay Rogers, Headmelted https://github.com/headmelted
- GitHub, can’t get code-oss to launch raspberry pi 3b https://github.com/headmelted/codebuilds/issues/67
- Blink Blink ICE Tower CPU Cooling Fan for Raspberry Pi https://www.seeedstudio.com/Blink-Blink-ICE-Tower-CPU-Cooling-Fan-for-Raspberry-Pi-Support-Pi-4-p-4215.html
My posts on El Bruno
My posts on Raspberry Pi ⚡🐲⚡
Dev posts for Raspberry Pi
- How to grant permissions to a folder after git clone, to perform dotnet restore on a Raspberry Pi
- How to install .Net Core 3.1 in a Raspberry Pi 4
- Installing Visual Studio Code in a Raspberry Pi 4, run as root, fix black screen
- How to install .Net Core in a Raspberry Pi 4 and test with Hello World
- Build and Run C# NetCore projects in a Raspberry Pi 4 with Visual Studio Code
- Let’s do some Git dev in Raspberry Pi 4 (GitHub and Azure DevOps!)
- Install OpenCV
- Install Python 🐍 Virtual Environments in Raspberry Pi
- Setup SSH passwordless access to remote work with Docker 🐳
- Manage Docker 🐳 as a non-root user
- Build Docker 🐳 images from Visual Studio Code remotely using a Raspberry Pi
Tools and Apps for Raspberry Pi
- Where is my Task Manager in RaspberryPi? Let’s try htop
- Multi-monitor 📺 in Raspberry Pi 4 rocks !
- Double Commander on RaspberryPi4, because files are important
- How to install Docker 🐳 in a Raspberry Pi 4
- Installing Visual Studio Code in a Raspberry Pi
- Installing Visual Studio Code in a Raspberry Pi, run as root, fix black screen (Updated)
- 6 commands to install OpenCV for Python 🐍 in a Raspberry Pi 4
Setup the device
- 1st Setup without monitor 📺: auto connect to WiFi 📶, enable SSH, update and more
- Setup without monitor: enable VNC
- How to enable auto start with HDMI safe mode
- Running a Python 🐍 script in a Python Virtual Environment on reboot / startup
- Setup Wifi on Ubuntu

Leave a comment