Hello!
A few days ago I wrote a post on HoloToolkit, a great set of Unity assets which are very useful if we create 3D apps. Today, I almost accidentally discovered that in addition to assets for the creation of apps, HoloToolkit adds a few useful menu options in Unity.
Let´s review the basic way to install and use HoloToolkit
- Create a 3D project in Unity
- Download the latest HoloToolkit version from Github
- Unzip and copy the contents of HoloToolkit to the Assets folder of the new Unity3D project
- This process may take a while since Unity processes all the elements that have been added to the project

- Once added and processed all the HoloTookit items, we can see them in the Project panel

- In addition, and this is so interesting, we have a new menu in Unity called “HoloToolkit”
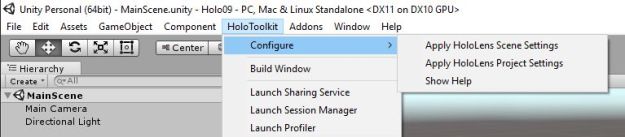
- In the new menu, we can find several options, as for example the ability of adjust the Scene where are working with them options that need for a project for Hololens. This usually is translated in
- Set MainCamera X,Y,Z positions to 0
- Set MainCamera ClearFlags from Skybox to SolidColor
- Set MainCamera Background color to Solid Black
- Set MainCamera NearClippingPlane to 0.85
- In the following video we can see how this option saves us 5 minutes of work

- “Build Window” option also allows us to accelerate the build process a little bit. I found some problems with this option, since once the Open SLN is not working fine, we can not change the IP of deploy and other details.
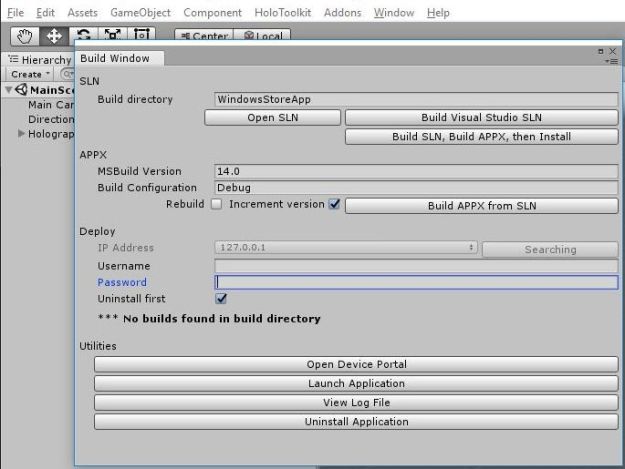
- I guess that it will be a question of reporting these bugs and see if any update fixes them. Or, if I have more time, learn a bit of scripting of Unity and see if I can solve something and share it (this last it see little likely)
Greetings @ Toronto
El Bruno
References
- GitHub, HoloToolkit
- GitHub, HoloToolkit Unity
- El Bruno, HoloToolKit, amazing set of assets to create Hololens Apps

Leave a comment