⚠️ This blog post was created with the help of AI tools. Yes, I used a bit of magic from language models to organize my thoughts and automate the boring parts, but the geeky fun and the 🤖 in C# are 100% mine.
Hi!
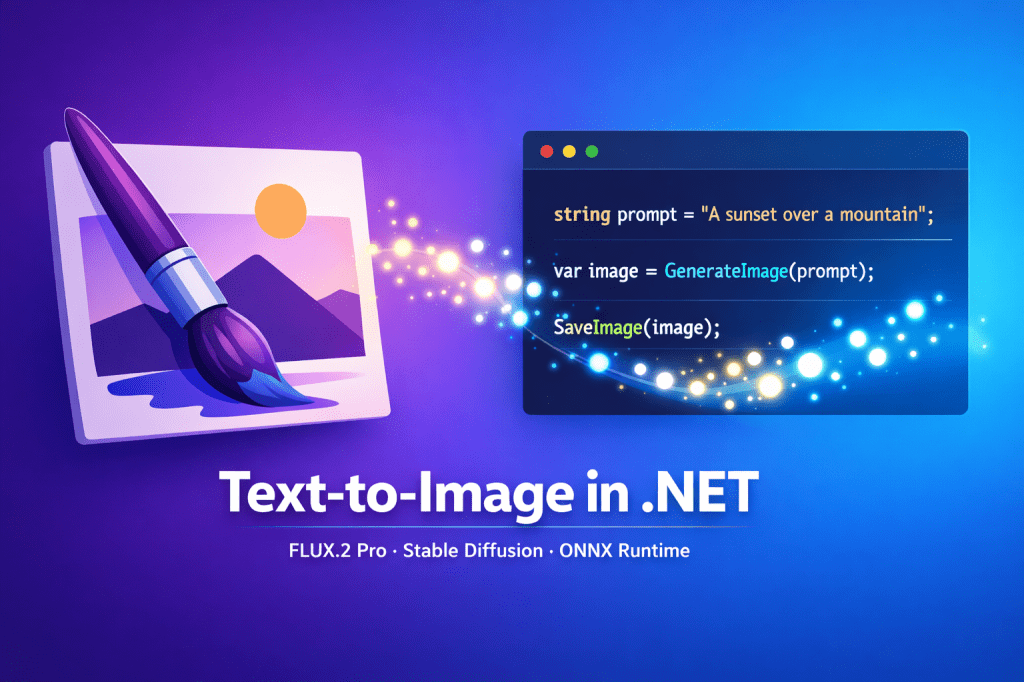
Two weeks ago, I shipped t2i — a terminal-first CLI for text-to-image generation. Today I’m excited to announce two major additions that make t2i even more powerful:
- GPT-Image-1.5 and GPT-Image-2 support — Microsoft’s DALL-E 3 and next-gen models via Azure OpenAI
- AI agent skill integration — Teach GitHub Copilot and Claude Code to use
t2iautomatically
TL;DR
- New models: GPT-Image-1.5 (DALL-E 3) and GPT-Image-2 (next-gen) now available via Azure OpenAI
- Skill integration: Run
t2i initto teach GitHub Copilot and Claude Code how to generate images autonomously - Updated providers: Now supporting 5 cloud models (FLUX.2 Pro, FLUX.2 Flex, MAI-Image-2, GPT-Image-1.5, GPT-Image-2)
- Version: Available in
t2iv0.16.0+ viadotnet tool update --global ElBruno.Text2Image.Cli
🤖 Part 1: AI Agent Skills — The Biggest Feature
This is the feature I’m most excited about: teaching AI agents how to use t2i automatically
What Are Skills?
Skills are packages of functionality that AI coding agents can discover and invoke on their own. By installing a skill file, you enable agents like GitHub Copilot and Claude Code to:
- Generate images directly within your development workflow
- Automate batch creation based on natural language requests
- Integrate image generation into CI/CD pipelines and automation scripts
Skills work by placing metadata files in well-known directories (.github/skills/ for Copilot, .claude/skills/ for Claude Code) that agents scan during initialization. Once installed, these agents understand:
- Which
t2icommands exist and when to use each one - How to set up secrets safely (env vars first, never commit keys)
- The full provider list and which one to default to
- Common workflows: first-time setup, single image, batch loops
How to Set It Up
Install the cli tool locally, setup the tool and from any repository:
t2i init
That’s it. This command writes skill metadata to:
.github/skills/t2i/SKILL.md(for GitHub Copilot).claude/skills/t2i/SKILL.md(for Claude Code)
Want only one target?
t2i init --target github # GitHub Copilot onlyt2i init --target claude # Claude Code only
The skill files include:
- Tool overview and capabilities
- Command syntax with examples
- Provider configuration instructions
- Best practices and troubleshooting tips
Real-World Example: GitHub Copilot
After running t2i init --target github, you can interact with Copilot naturally:
You: “Generate a futuristic cityscape with neon lights and save it as hero.png”
Copilot: Automatically invokes:
t2i "futuristic cityscape with neon lights, cyberpunk style, volumetric fog" \ --provider foundry-flux2 \ --width 1792 \ --height 1024 \ --output hero.png
You: “Create a series of social media images for our product launch — abstract tech theme”
Copilot: Automatically invokes:
t2i "abstract tech background with circuit patterns" --output social-1.pngt2i "geometric tech shapes with gradient colors" --output social-2.pngt2i "digital network visualization, modern style" --output social-3.png
No need to remember the exact syntax or provider flags — Copilot handles it.
Real-World Example: Claude Code
After running t2i init --target claude, Claude can drive t2i based on your requests:
You: “I need an image of a sunset over mountains for the landing page, wide format”
Claude: Automatically invokes:
t2i "sunset over mountains, warm golden hour colors, panoramic view" \ --provider foundry-flux2 \ --width 1792 \ --height 1024 \ --output landing-hero.png
You: “Generate icon placeholders: home, settings, profile — all square, simple line art”
Claude: Automatically invokes multiple commands:
t2i "home icon, simple line art, minimalist, 512x512" --out icon-home.pngt2i "settings icon, simple line art, minimalist, 512x512" --out icon-settings.pngt2i "profile icon, simple line art, minimalist, 512x512" --out icon-profile.png
Why This Matters
Before skills, you had to:
- Remember
t2isyntax - Look up provider names
- Check configuration flags
- Write your own automation scripts
With skills installed, AI agents become your image generation assistant:
- They know the syntax
- They pick the right provider
- They handle dimensions and output paths
- They batch generate when appropriate
This is especially powerful in CI/CD scenarios. Imagine a GitHub Actions workflow where Copilot autonomously generates marketing assets, social media images, or documentation screenshots based on a simple prompt list.
Configure providers first
Before your AI agent can use t2i, ensure at least one provider is configured:
t2i config # Interactive setup
Use environment variables in CI/CD
For automated workflows, configure via env vars:
# GitHub Actions example- name: Generate images env: T2I_FOUNDRY_FLUX2_ENDPOINT: ${{ secrets.FOUNDRY_ENDPOINT }} T2I_FOUNDRY_FLUX2_APIKEY: ${{ secrets.FOUNDRY_APIKEY }} run: | dotnet tool install --global ElBruno.Text2Image.Cli t2i init t2i "hero image for landing page" --provider foundry-flux2 --out assets/hero.png
Update skills after CLI upgrades
When you update t2i, refresh the skill metadata:
dotnet tool update --global ElBruno.Text2Image.Clit2i init # Regenerates skill files with latest docs
More Details
For the complete skill integration guide, including troubleshooting, advanced customization, and platform-specific instructions, see:
🎨 Part 2: GPT-Image Models — More Choices
Now for the second big update: GPT-Image-1.5 and GPT-Image-2 support.
These are Microsoft’s image generation models available via Azure OpenAI Service. Both are based on OpenAI technology but deployed in Azure for enterprise-grade reliability, compliance, and control.
GPT-Image-1.5 (DALL-E 3)
What it is: Azure OpenAI’s implementation of OpenAI’s DALL-E 3 model.
Best for:
- Natural language prompts — Excellent at understanding complex, conversational descriptions
- Photorealistic images — Great for realistic scenes, portraits, and product photography
- Text rendering — Better at including readable text in images (though still not perfect)
- Enterprise compliance — Deployed in your Azure region with full data residency
Supported sizes:
- 1024×1024 (square)
- 1792×1024 (landscape)
- 1024×1792 (portrait)
Example use cases:
- Marketing visuals with text overlays
- Product mockups and packaging designs
- Editorial illustrations for blog posts
- Social media graphics
GPT-Image-2 (Next-Gen)
What it is: Microsoft’s next-generation image model — more advanced than DALL-E 3.
Best for:
- High-quality artistic images — Improved coherence and style consistency
- Complex compositions — Better at multi-object scenes with detailed relationships
- Stylized rendering — Excels at specific art styles (watercolor, oil painting, digital art)
- Prompt adherence — Follows instructions more accurately, especially for abstract concepts
Supported sizes:
- 1024×1024 (square)
- 1792×1024 (landscape)
- 1024×1792 (portrait)
Example use cases:
- Concept art and game design
- Artistic book cover designs
- Abstract and stylized illustrations
- Character design and visual development
How to Use Them
Both models use the Azure OpenAI Service, so you need:
- An Azure subscription
- An Azure OpenAI resource
- A deployment of
gpt-image-1.5orgpt-image-2 - Your endpoint URL and API key
Quick Setup (GPT-Image-1.5)
# Interactive setup wizardt2i config set foundry-gpt-image-1p5
The wizard prompts for:
- Endpoint URL (e.g.,
https://my-resource.openai.azure.com/) - API Key (from Azure Portal)
- Deployment name (e.g.,
gpt-image-15)
Then generate:
t2i "an impressionist painting of a garden in spring" \ --provider foundry-gpt-image-1p5
Quick Setup (GPT-Image-2)
# Interactive setup wizardt2i config set foundry-gpt-image-2
Then generate:
t2i "a sci-fi space station orbiting a ringed planet, digital art" \ --provider foundry-gpt-image-2
PowerShell Examples
# GPT-Image-1.5: Photorealistic product shott2i "professional product photo of a smartwatch on marble, studio lighting" ` --provider foundry-gpt-image-1p5 ` --width 1792 ` --height 1024 ` --output product-hero.png# GPT-Image-2: Abstract art for website headert2i "abstract geometric patterns with vibrant gradients, modern tech aesthetic" ` --provider foundry-gpt-image-2 ` --output header-bg.png
Bash Examples
# GPT-Image-1.5: Editorial illustrationt2i "a serene lake at sunrise with mountains in the distance, photorealistic" \ --provider foundry-gpt-image-1p5 \ --width 1792 \ --height 1024 \ --output editorial.png# GPT-Image-2: Character concept artt2i "character concept art of a futuristic knight, armor with neon accents, digital painting" \ --provider foundry-gpt-image-2 \ --width 1024 \ --height 1792 \ --output character.png
Switching Models
You can set a default provider in your config:
# Use GPT-Image-2 as defaultt2i config set default-provider foundry-gpt-image-2# Now this uses GPT-Image-2t2i "your prompt here"
Or specify per-command:
# Compare outputs from different modelst2i "a cyberpunk cityscape" --provider foundry-flux2 --output flux-city.pngt2i "a cyberpunk cityscape" --provider foundry-gpt-image-2 --output gpt-city.png
Complete Provider List
Here’s the full lineup after this update:
| Provider ID | Model | Provider | Best For |
|---|---|---|---|
foundry-flux2 | FLUX.2 Pro | Microsoft Foundry | Photorealistic images, fine control |
foundry-flux2 (Flex) | FLUX.2 Flex | Microsoft Foundry | Text-heavy designs, logos |
foundry-mai2 | MAI-Image-2 | Microsoft Foundry | Fast iteration, rich prompts |
foundry-gpt-image-1p5 | GPT-Image-1.5 | Azure OpenAI | Natural language, photorealism |
foundry-gpt-image-2 | GPT-Image-2 | Azure OpenAI | Next-gen quality, style consistency |
How to choose:
📊 Model Comparison
Here’s a quick comparison to help you choose:
| Feature | FLUX.2 Pro | MAI-Image-2 | GPT-Image-1.5 | GPT-Image-2 |
|---|---|---|---|---|
| Quality | ⭐⭐⭐⭐⭐ | ⭐⭐⭐⭐ | ⭐⭐⭐⭐ | ⭐⭐⭐⭐⭐ |
| Speed | ~30-40s | ~15-20s | ~8-12s | ~8-12s |
| Photorealism | Excellent | Good | Excellent | Excellent |
| Artistic Styles | Good | Excellent | Good | Excellent |
| Text Rendering | Poor | Fair | Good | Good |
| Prompt Adherence | Excellent | Very Good | Very Good | Excellent |
| Custom Sizes | ✅ Any size | ✅ Any size | ❌ Fixed sizes | ❌ Fixed sizes |
| API Type | Async (polling) | Async (polling) | Sync | Sync |
| Provider | Microsoft Foundry | Microsoft Foundry | Azure OpenAI | Azure OpenAI |
Performance notes:
- FLUX.2 and MAI models use asynchronous polling (submit → poll → retrieve)
- GPT-Image models use synchronous API (submit → wait → receive)
- First request may be slower due to model warm-up
- Batch jobs benefit from parallel requests
🔄 Migration Guide
If you’re already using t2i with FLUX.2 or MAI-Image-2, upgrading is straightforward.
Step 1: Update the CLI
dotnet tool update --global ElBruno.Text2Image.Cli
Verify:
t2i --version# Should show v0.16.0 or later
Step 2: List New Providers
t2i providers
You should see:
foundry-gpt-image-1p5— GPT-Image-1.5 / DALL-E 3foundry-gpt-image-2— GPT-Image-2 (Next-Gen)
Step 3: Configure GPT Models (Optional)
If you want to use GPT-Image models:
t2i config set foundry-gpt-image-1p5 # Configure GPT-Image-1.5t2i config set foundry-gpt-image-2 # Configure GPT-Image-2
Step 4: Update Skill Files
If you previously ran t2i init, refresh your skill metadata:
t2i init --force # Overwrites existing skill files
This ensures GitHub Copilot and Claude Code know about the new models.
Step 5: Test
t2i doctor
Check that all providers show as “configured” and “healthy.”
🚀 What’s Next
This release adds major capabilities, but there’s more coming:
v0.17.0+ (Q2 2026):
- Local inference edition — CPU, CUDA, DirectML providers (no cloud required)
- Model marketplace — Download and manage local ONNX models
- Batch API — Submit multiple prompts in one call
- Image-to-image — Use existing images as input for variations
Community-requested features:
- Negative prompts — Specify what not to include
- Style presets — Quick templates (e.g.,
--style cinematic) - Config profiles — Switch between dev/prod configurations
- Web UI — Optional browser-based interface
Want to influence the roadmap? File a feature request:
→ github.com/elbruno/ElBruno.Text2Image/issues
📚 Links & Resources
Documentation:
Installation:
Community:
Model: GPT-Image-2
Size: 1792×1024 (landscape)
Generation time: ~9.2 seconds
Cost: ~$0.15
This demonstrates GPT-Image-2’s ability to understand abstract concepts (a terminal “emitting” images) and render them with artistic style.
Questions? Feature requests? Found a bug?
→ github.com/elbruno/ElBruno.Text2Image/issues
Happy coding!
Greetings
El Bruno
More posts in my blog ElBruno.com.
More info in https://beacons.ai/elbruno

Leave a comment