
Hi !
Here is an important reminder before starting:
Please do not use as a guide to deploy to production environments.
I was reading a lot about Azure Container Registry and other container scenarios. And most of the demos / tutorials are based on .Net Container Web Apps. Which is great, however there are no much information about the same process using Python Container Web Apps. So, I take this as an excuse to learn something new and here I am 😁, Let’s start.
Python Web App using Flask
I started with a simple Python Flask app. For this demo, I will use a post I write about flask and multi threading (see references for the full post).
# Bruno Capuano
# start a webserver with flask in a thread
# start a different thread +1 a shared var

from flask import Flask
import threading
import time

iCounter = 0
data = 'foo'
app = Flask(__name__)

def mainSum():
    # increment counter every second
    global iCounter
    while True:
        iCounter = iCounter + 1
        t = time.localtime()
        current_time = time.strftime("%H:%M:%S", t)
        print(str(f"{current_time} - data {iCounter}"))
        time.sleep(1)

def startWebServer():
     app.run(host='0.0.0.0', port=8100)

@app.route("/getdata")
def main():
    global iCounter
    t = time.localtime()
    current_time = time.strftime("%H:%M:%S", t)
    return str(f"{current_time} - data {iCounter}")

if __name__ == "__main__":
    stateThread = threading.Thread(target=mainSum)
    stateThread.daemon = True
    stateThread.start()

    webThread = threading.Thread(target=startWebServer)
    webThread.start()
This a resource consuming app, so be careful with this code!
Create a Docker container for the app
So next step was a to create a container for the app. This is my docker file. I added the commands to build and run the image at the bottom.
FROM python:3.7-slim

RUN pip install -U pip
RUN pip install --no-cache-dir flask~=1.1.2

COPY app /app

# Expose the port, default 8100
EXPOSE 8100

# Set the working directory
WORKDIR /app

# Run the flask server for the endpoints
CMD python -u app.py

# Commands to build and run the image
# docker build --pull --rm -f "Dockerfile" -t dockertoazure-webapp-service "."
# docker run -d -p 8100:8100 --privileged --name dockertoazure-webapp-service dockertoazure-webapp-service:latest
So, build and run my docker image and everything works fine !

Double check in Portainer, because I’m not a command line person

So, here my 1st milestone:
A local python web app using flask, in a docker container ready to be used elsewhere.
Push local Image to Azure
Our next step will be to have a Azure container registry, that will be the place that we will use as repository in Azure to host our images. In the references section the official definition is:
An Azure container registry is a private Docker registry in Azure where you can store and manage private Docker container images and related artifacts. In this quickstart, you create a container registry with the Azure portal. Then, use Docker commands to push a container image into the registry, and finally pull and run the image from your registry.
Quickstart: Create an Azure container registry using the Azure portal
I will assume Azure CLI is installed, so next step will be to login to azure and also login to your container.
# LOGIN TO AZURE
az login
az acr login --name <container name>.azurecr.io
Next step will require to have a tagged image for the Azure Container Registry.
# TAG LOCAL IMAGE
docker tag dockertoazure-webapp-service <container name>.azurecr.io/dockertoazure-webapp-service:v1
And, time to push the local image to the cloud !
# PUSH LOCAL IMAGE
docker push <container name>.azurecr.io/dockertoazure-webapp-service:v1
And we have 2 ways to check if the image was successfully pushed. Using the command line
# LIST CURRENT REPOSITORIES
az acr repository list -n <container name>.azurecr.io

We can also use the Azure Portal to check the available repositories

Running the Docker image in a WebApp
And here comes the tricky part. Once you select a repository, you can see the tags of the image and you can deploy a WebApp directly from there.

However, if you haven’t created a WebApp using other steps, you won’t have this option enabled.
Note: My guess is that until you have an Linux usage plan created, the [Run instance] and [Deploy to web app] options will be disabled. In this scenario, you may want to skip next steps and go directly to option 2.
Let’s see both options. From the context menu, from the previous image, create a web app is just a single step

A couple of seconds later we have our App up and running

The 2nd option to create your Web App is creating a new [Web App for Containers]

And here we found a couple of interesting options, like create a web site based on a docker container:

And in the next step, we can choose the image that we uploaded in previous steps

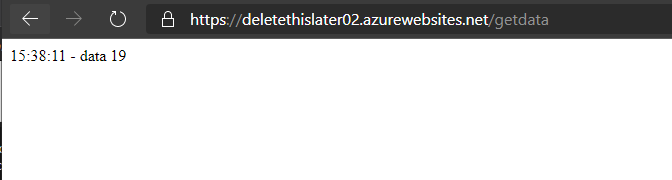
And, again, a couple of seconds later, we also have this new App up and running
Conclusion
So, nothing new here. I haven’t found an article or post, that describes this, so I put all the pieces together and dump this lines. Again an important warning
There are much better ways to do this ! Think on a DevOps approach.
I promise to write a follow up on this one, with the step-by-step details on this using GitHub actions. Which is the right way.
Happy coding!
Greetings
El Bruno
More posts in my blog ElBruno.com.
More info in https://beacons.ai/elbruno

Leave a comment