> ⚠️ This blog post was created with the help of AI tools. Yes, I used a bit of magic from language models to organize my notes and automate the boring parts, but the geeky fun is 100% mine.
Hi!
The GitHub Copilot app can use models from your GitHub Copilot subscription, and it can also connect to models deployed in Microsoft Foundry.
This is a classic bring your own key, or BYOK, scenario:
GitHub Copilot app
        ↓
Custom Azure OpenAI provider
        ↓
Azure OpenAI v1 Responses API
        ↓
Model deployed in Microsoft Foundry
In this post, I will configure a gpt-5.6-sol deployment. The same pattern applies to other Azure OpenAI models that support the v1 Responses API.
Let’s do it! 🚀
TL;DR
This is the provider configuration:
| GitHub Copilot app setting | Value |
|---|---|
| Provider type | Azure OpenAI |
| Endpoint | https://.services.ai.azure.com/openai/v1/ |
| API version | v1 |
| Wire API | responses |
| API key | A key from the Foundry/Azure OpenAI resource |
| Custom headers | {} |
This is the model configuration:
| Model setting | Value |
|---|---|
| Display name | Any friendly name, for example gpt-5.6-sol |
| Wire model | Exact Azure deployment name; optional when it matches the display name |
| Reasoning effort | Select the levels supported by the deployed model |
The two identifiers that matter are:
- Endpoint: identifies the Azure OpenAI resource and API surface.
- Wire model: identifies the deployment inside that resource.
Prerequisites
Before opening the GitHub Copilot app settings, you need:
- A Microsoft Foundry or Azure OpenAI resource.
- A deployed model that supports the Azure OpenAI v1 API.
- The deployment name.
- The resource endpoint.
- An API key for the resource.
- Network access from your computer to the Azure endpoint.
For this example:
Model:            gpt-5.6-sol
Deployment name:  gpt-5.6-sol
Deployment type:  GlobalStandard
Wire API:         Responses
Step 1: open the model deployment in Microsoft Foundry
Open Microsoft Foundry, select your project or resource, and navigate to:
Models + endpoints → → Details
The deployment details page contains:
- the model and deployment name;
- the deployment type;
- the inference endpoint;
- authentication information.
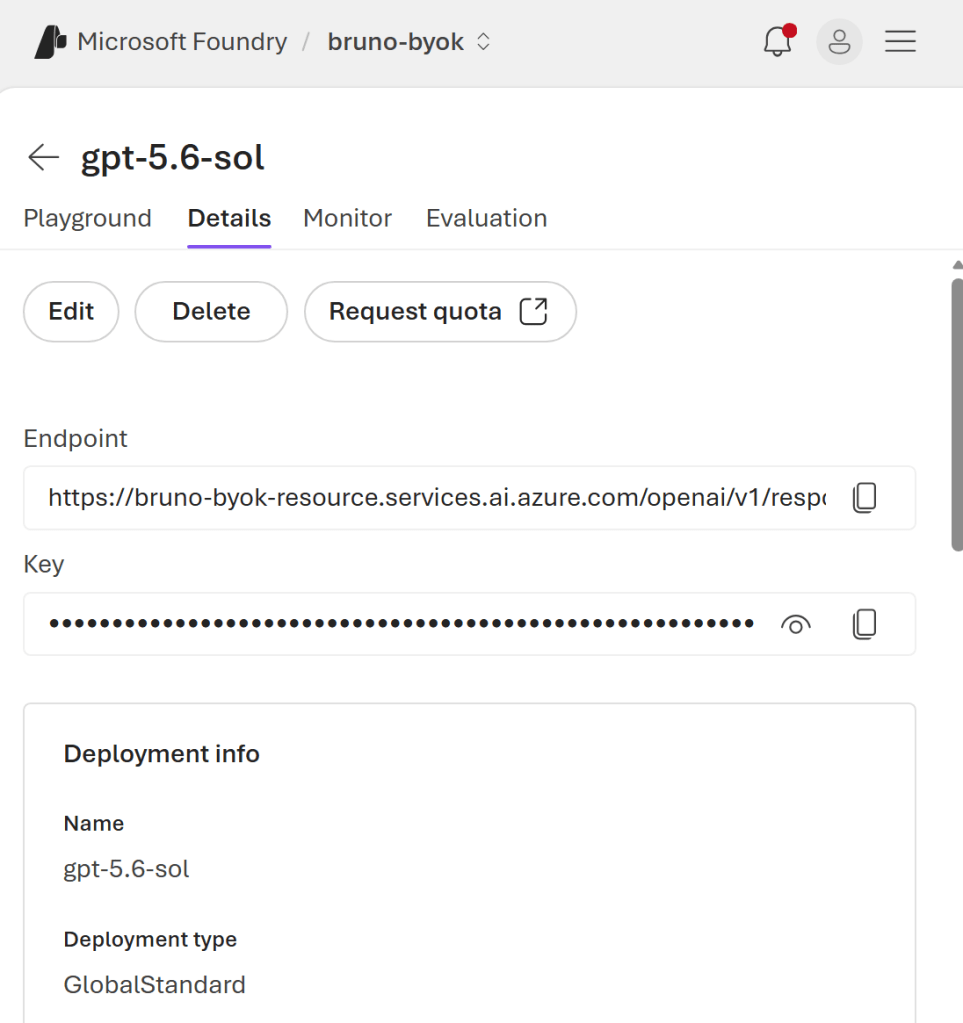
The endpoint displayed by Foundry can be the complete operation URL:
https://.services.ai.azure.com/openai/v1/responses
For the GitHub Copilot app provider, use the base v1 endpoint:
https://.services.ai.azure.com/openai/v1/
The app adds the Responses operation based on the selected Wire API.
Resource endpoint versus operation URL
These values represent different layers:
Resource host
https://.services.ai.azure.com

API base path
/openai/v1/

Operation
responses
Combined, they produce:
https://.services.ai.azure.com/openai/v1/responses
The provider stores the first two parts. The selected Wire API provides the last part.
Step 2: add an Azure OpenAI provider
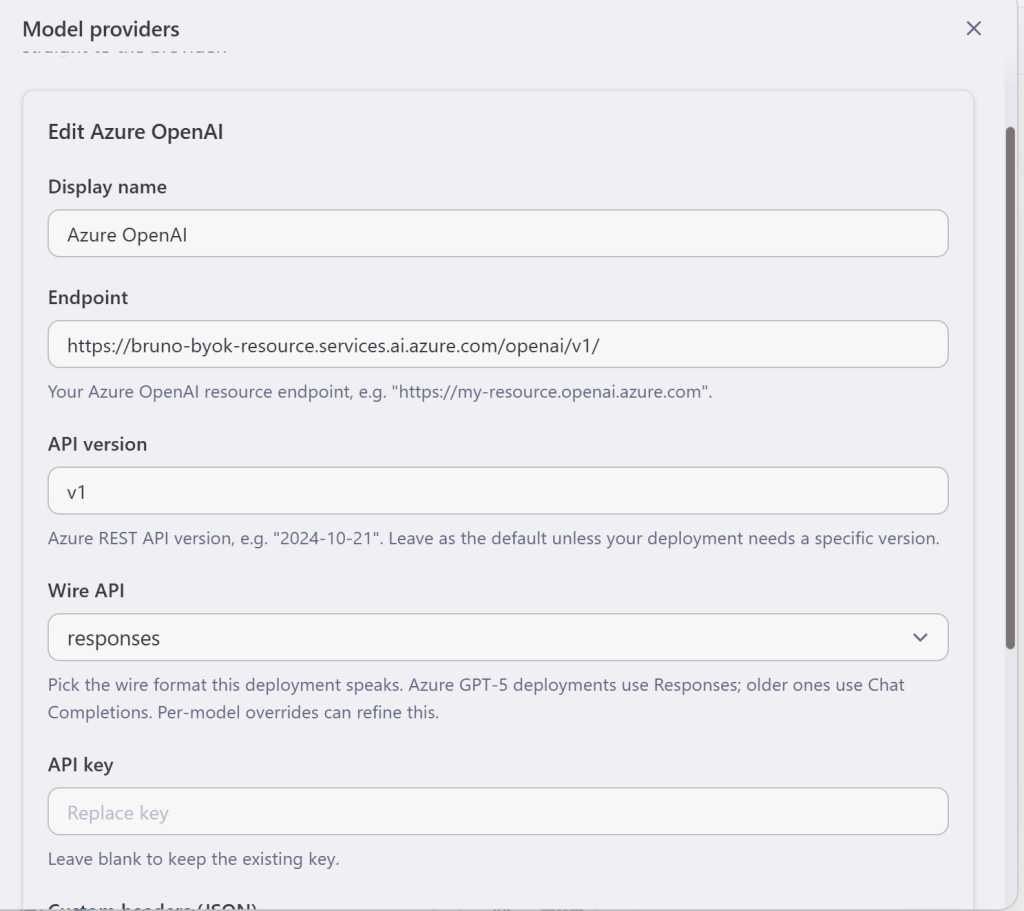
In the GitHub Copilot app, open:
Settings → Model providers → Add provider → Azure OpenAI
Use:
Display name:   Azure OpenAI
Endpoint:       https://.services.ai.azure.com/openai/v1/
API version:    v1
Wire API:       responses
API key:
Custom headers: {}
Endpoint
The endpoint must:
- use the exact hostname assigned to the resource;
- include
/openai/v1/; - stop at the v1 base path;
- not include the deployment name;
- not include the API key;
- not include
/responses.
Both Azure OpenAI endpoint formats are supported by the v1 API:
https://.openai.azure.com/openai/v1/
and:
https://.services.ai.azure.com/openai/v1/
Use the hostname shown for your resource in Microsoft Foundry or the Azure portal.
API version
Use:
v1
The Azure OpenAI v1 API is a continuously updated API surface. Unlike older Azure OpenAI APIs, it does not require applications to move between monthly dated API versions.
In the GitHub Copilot app provider UI, v1 selects the correct API generation for this configuration.
Do not confuse the API version with the model version:
| Value | Meaning |
|---|---|
v1 |
Azure OpenAI API generation |
gpt-5.6-sol |
Model family |
2026-07-09 |
Version of the model build |
gpt-5.6-sol |
Deployment name in this example |
Wire API
Select:
responses
This tells the app to use:
POST /openai/v1/responses
and the Responses API request schema.
Conceptually, the request body is:
{
  "model": "gpt-5.6-sol",
  "input": "Hi!"
}
This is different from the older Chat Completions API, which uses a messages array.
API key
Paste one of the keys associated with the same Azure resource as the endpoint.
The important relationship is:
API key resource == endpoint resource
Do not add the key to custom headers or include it in the endpoint.
Custom headers
No custom headers are required for standard inference with the v1 Responses API:
{}
Some feature-specific preview APIs use opt-in headers. Basic text generation with a deployed model does not need them.
Step 3: add the deployed model
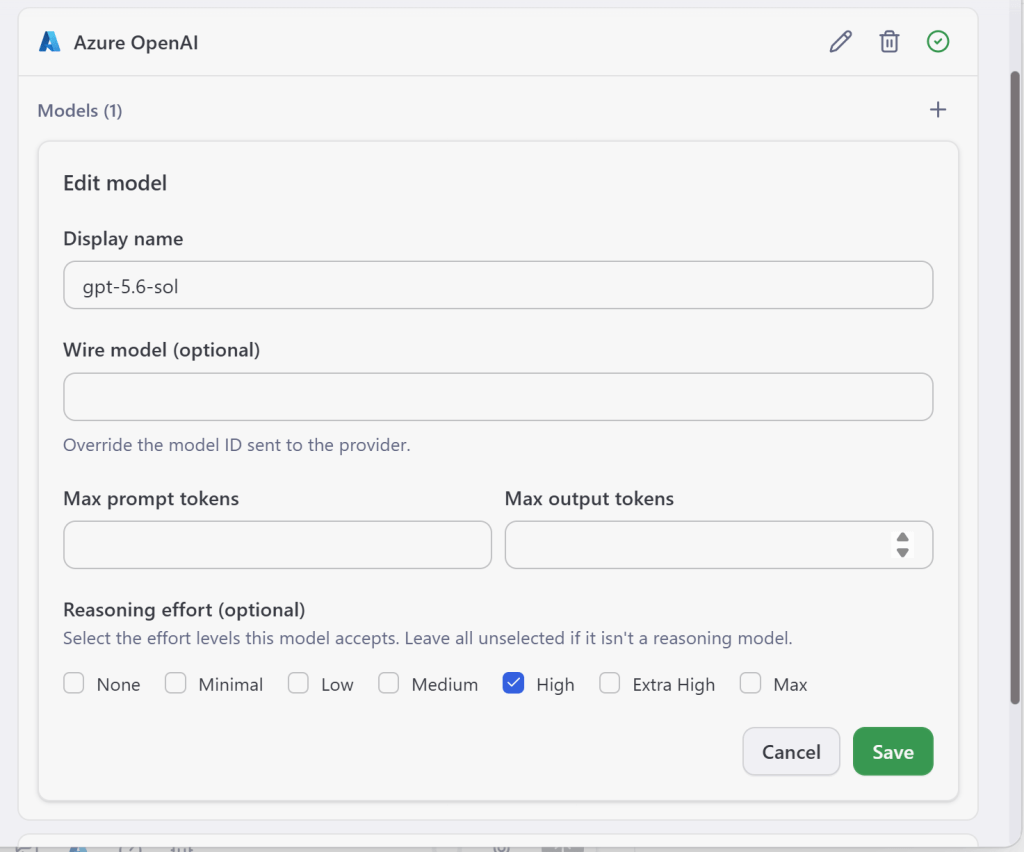
Inside the new Azure OpenAI provider, select Add model.
Configure:
Display name:      gpt-5.6-sol
Wire model:
Reasoning effort:  High
### Display name
This is the friendly name displayed by the GitHub Copilot app.
It does not have to match the Azure model or deployment name:
“`text
GPT-5.6-sol on Azure
Production reasoning model
Foundry GPT-5.6
“`
### Wire model
This is the identifier sent in the `model` property of the request.
Azure OpenAI routes requests using the **deployment name**, not only the catalog model name.
For example, if Foundry contains:
“`text
Catalog model: gpt-5.6-sol
Deployment name: gpt-5-6-sol-prod
“`
configure:
“`text
Display name: gpt-5.6-sol
Wire model: gpt-5-6-sol-prod
“`
The app displays the friendly model name but sends:
“`json
{
“model”: “gpt-5-6-sol-prod”
}
“`
When the display name already matches the deployment name, Wire model can remain empty.
### Token limits
The model editor also supports optional prompt and output token limits.
Leave these fields empty unless you want the app to apply a limit that is lower than the deployment capability. Azure quotas and model limits continue to apply independently.
### Reasoning effort
Select the reasoning levels accepted by the model deployment.
For this example, I enabled:
“`text
High
“`
Reasoning effort affects how much internal reasoning the model can use before returning its answer. Higher effort can improve complex planning and analysis, while increasing latency and token consumption.
## Step 4: save and verify the provider
After saving the provider and model, the Model providers page displays the Azure OpenAI provider and its configured model.
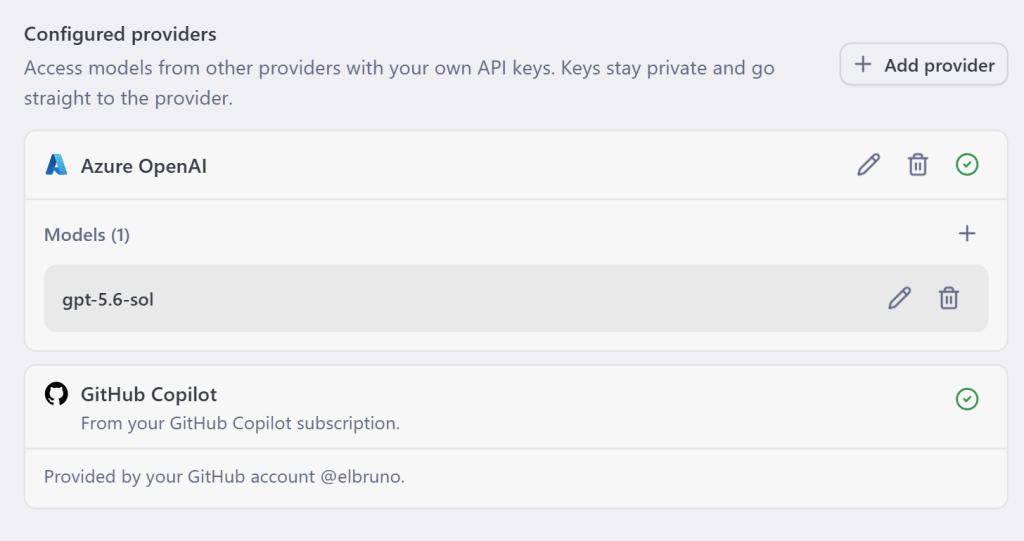
The provider status indicator should be healthy.
At this point, the app has enough information to construct the complete request:
Provider endpoint
https://.services.ai.azure.com/openai/v1/

Wire API
responses

Wire model
gpt-5.6-sol

Authentication
Azure OpenAI resource key
Step 5: select the model and send a prompt
Create a new chat and select the newly configured Azure OpenAI model.
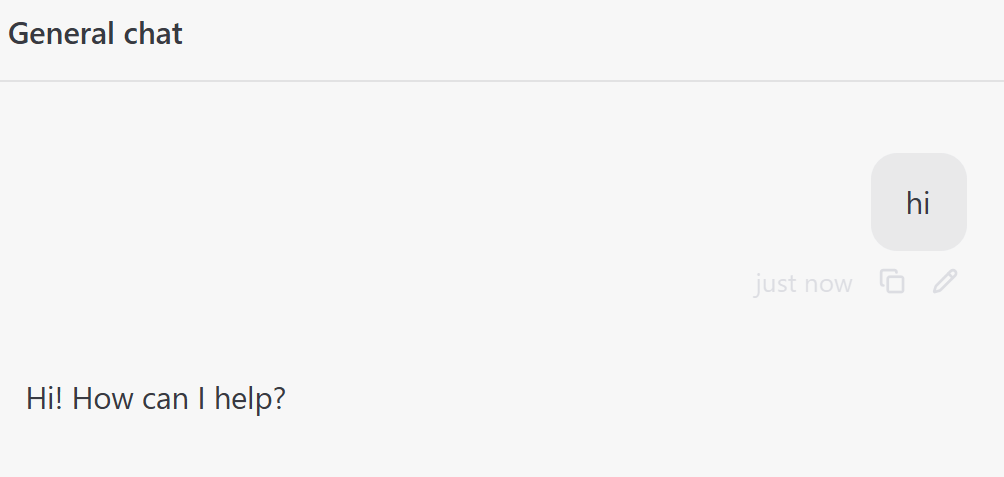
Send a simple prompt:
Hi!
Final configuration
The final setup is:
Microsoft Foundry deployment
        ↓ deployment name

GitHub Copilot app model
        ↓ Wire model

Azure OpenAI provider
        ├── Endpoint: .../openai/v1/
        ├── API version: v1
        ├── Wire API: responses
        └── Authentication: resource API key
This gives the GitHub Copilot app direct access to your Azure-hosted deployment while keeping model routing, quota, and billing attached to your Microsoft Foundry resource.
Simple, explicit, and ready for more models. 😁
References
Happy coding!
Greetings
El Bruno
More posts in my blog ElBruno.com.
More info in https://beacons.ai/elbruno


Leave a Reply