
Hi!
I’m very careful with my disk space, however my C: drive in Windows 10 started to claim about low space. I got 3 disks on my machine, 2 SSDs and a regular one; and I always check to install all my software on my D: drive. So, that’s why running low space on C: was shocking.
So, I did a small check on the apps and contents using a lot of disk and I found 2 main sources
- Windows 10 SDKs
- DotNet Core SDKs and Runtimes
Every time a new version of Windows 10 is released, and I build a Windows 10 App, I get a new Windows SDK. Each one is around 2GBs, I got almost 20, so make your numbers.
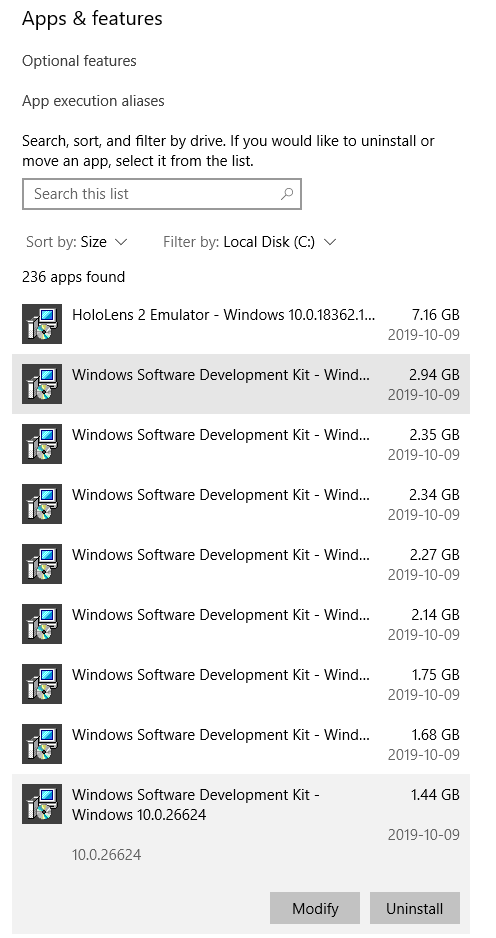
Note: There is a cool feature to find usage space of installed apps by this, out of the box in Windows Settings.
The second one was related to .Net Core. I had a lot of versions installed, and every time I get a new update on Visual Studio 2019, it seems that I’m updating also my .Net Core SDKs. Right now, I only care about .Net Core 3, so it was time to uninstall all the others.

The official documentation ” How to remove the .NET Core Runtime and SDK” (see references) wasn’t very helpful. However, it was a good source to learn more about dotnet command, specially this one:
C:\> dotnet --list-sdks
This command list all the installed SDKs, and with a little of PowerShell scripting I manage to uninstall almost everything. Once I started this path, I also realize that the
$app.Uninstall()
command was not working, so a little search pointed me into an old article from Scott Hanselman, where he did a similar script to remove old .Net Core versions (see references).
The final script is
You can also get the ps1 file directly from GitHub here https://github.com/elbruno/Blog/tree/master/20191016%20Uninstall%20NetCore%20Versions
And a warning, the script will list all the installed dotnet sdks

And then, when the uninstall process start, we will require to confirm each uninstall action. Not very user friendly, but it get the work done!

Final advice is to repair the .Net Core 3 version, just in case something is missing.

Happy coding!
Greetings @ Burlington
El Bruno
References
- How to remove the .NET Core Runtime and SDK, https://docs.microsoft.com/en-us/dotnet/core/versions/remove-runtime-sdk-versions?tabs=windows
- dotnet command, https://docs.microsoft.com/en-us/dotnet/core/tools/dotnet?tabs=netcore21#options
- Scott Hanselman, Scripts to remove old .NET Core SDKs, https://www.hanselman.com/blog/ScriptsToRemoveOldNETCoreSDKs.aspx

Leave a comment