⚠️ This blog post was created with the help of AI tools. Yes, I used a bit of magic from language models to organize my thoughts and automate the boring parts, but the geeky fun and the 🤖 in C# are 100% mine.
Hi!
I’ve been spending some airport time playing with MCP Apps, and one question kept coming back:
Can we build a real, interactive UI for MCP tools… using just C#?
Short answer: yes.
Long answer: let’s build one.
In this post, we’ll create a Color Picker MCP App using ASP.NET Core + Model Context Protocol, where:
- an MCP tool opens a UI
- the UI is provided by an MCP resource
- everything runs locally
- everything fits in a single
Program.cs
What are MCP Apps (in one minute)
Traditional MCP tools return text or structured data.
MCP Apps extend that idea by allowing tools to return interactive UIs, rendered directly by the MCP host (for example, VS Code).
Conceptually:
Host (VS Code) ↓ calls toolMCP Tool ↓ declares UI metadataMCP Resource (ui://...) ↓ returns HTMLHost renders UI
So instead of “pick a color by typing #3498DB”, we can let users click, drag, and visually choose.
Prerequisites
You’ll need:
- .NET SDK (tested with recent .NET versions)
- VS Code Insiders
- Basic familiarity with ASP.NET minimal APIs
The architecture of this sample
This app has three moving parts, all in one file:
- MCP Server + HTTP transport
- An MCP Tool (
ColorPicker) - An MCP Resource that serves HTML (
ui://color-picker/app.html)
Once you understand how these three connect, MCP Apps feel very natural.
Step 1: Create the MCP server
We start with a minimal ASP.NET Core app and enable MCP:
var builder = WebApplication.CreateBuilder(args);builder.WebHost.UseUrls("http://localhost:3001");builder.Services.AddMcpServer() .WithHttpTransport() .WithToolsFromAssembly() .WithResourcesFromAssembly();var app = builder.Build();// MCP endpointapp.MapMcp("/mcp");await app.RunAsync();
Key things to notice:
- The MCP server listens on
/mcp - Tools and resources are discovered via attributes
- Everything is exposed over HTTP
Step 2: Define an MCP Tool
This tool opens a color picker UI.
[McpServerToolType]public static class ColorPickerTools{ [McpServerTool] [Description("Open an interactive color picker to select a color visually.")] [McpMeta("ui", JsonValue = """{ "resourceUri": "ui://color-picker/app.html" }""")] public static ColorPickerResult ColorPicker( string? initialColor = "#3498DB") { return new ColorPickerResult { InitialColor = initialColor ?? "#3498DB", Message = "Opening color picker UI..." }; }}
Why this works
The important line is:
[McpMeta("ui", JsonValue = """{ "resourceUri": "ui://color-picker/app.html" }""")]
This tells the MCP host:
“This tool has a UI. You can find it at this resource URI.”
The tool does not return HTML.
It returns normal data, plus metadata that links it to a UI resource.
Step 3: Provide the UI as an MCP Resource
Now we define the resource that matches the ui:// URI.
[McpServerResourceType]public static class ColorPickerResources{ [McpServerResource( UriTemplate = "ui://color-picker/app.html", MimeType = "text/html", Title = "Color Picker UI")] public static async Task<string> GetColorPickerUI() { return await ColorPickerHtmlProvider.GetHtml(); }}
Important rule:
The
resourceUriin the tool must exactly match theUriTemplateof the resource.
This is how the host resolves the UI.
Step 4: The HTML UI (served from C#)
The UI itself is just HTML + CSS + JavaScript, returned as a string.
In this sample, the UI includes:
- A hue slider
- A gradient palette
- A preview area
- Clipboard copy
- VS Code theme variables for native look & feel
All of it lives inside:
public static class ColorPickerHtmlProvider{ public static Task<string> GetHtml() { var html = """ <!DOCTYPE html> <html> <!-- full HTML omitted for brevity --> </html> """; return Task.FromResult(html); }}
Nothing special here — just standard web tech.
Sending data back to the host
When the user clicks Select Color, the UI sends the result back:
window.parent.postMessage( { type: 'mcp-app-result', color: currentColor }, '*');
The MCP host listens for this message and uses it as the tool’s final selection.
This is what makes the UI interactive, not just decorative.
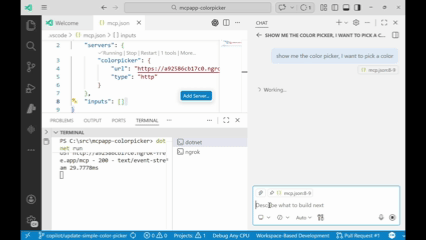
Step 5: Run it in VS Code
Start the server:
dotnet run
Then add it to your MCP configuration:
{ "type": "http", "url": "http://localhost:3001/mcp"}
Once loaded, you can invoke the ColorPicker tool and get a fully interactive UI instead of plain text.
Troubleshooting tips
If something doesn’t work:
- 404 on
/mcp→ ensure the app is running on port 3001 - Tool not found → check
[McpServerToolType]and[McpServerTool] - UI doesn’t render → verify
ui://color-picker/app.htmlmatches exactly - Port already in use → change
UseUrls(...)
Also note: not all MCP clients support MCP Apps UI yet.
Going further
This sample keeps everything in Program.cs on purpose.
For real projects, you may want to:
- Move HTML to
wwwroot - Split tools and resources into separate files
- Return richer typed results
- Add authentication when exposing the server publicly (especially with ngrok)
Resources
Want to learn more about MCP Apps? Here are the official resources:
- 📺 VS Code MCP Apps Video – Visual walkthrough of MCP Apps
- 📖 MCP Apps API Documentation – Technical details on bringing UI to MCP
- 📝 MCP Apps Announcement Blog – The official announcement
- 🚀 MCP Apps QuickStart – Getting started guide
- 💻 Official Samples Repository – Clone and explore the official samples
Get the Code
The complete source code is available on GitHub:
👉 github.com/elbruno/mcpapp-colorpicker
Feel free to fork it, extend it, or use it as a starting point for your own MCP Apps in .NET!
Happy coding!
Greetings
El Bruno
More posts in my blog ElBruno.com.
More info in https://beacons.ai/elbruno

Leave a comment