
Hi !
Sometime ago, I wrote a simple Python class a wrapper for YoloV3. This allows me to write 5 lines of code to analyze an image. Once I use this class, I only press F5 in Visual Studio Code and it’s magic:

A sample usage will be similar to this one. The only required parameter for the YoloV3 analyzer is the confidence. 0.5 is good enough for this demo:
| # Bruno Capuano 2020 | |
| # simple implementation for YoloV3 object detection | |
| import cv2 | |
| from yoloanalyzer import yoloV3_analyzer | |
| image_path = "02.jpg" | |
| # init Analyzer with confidence 50% | |
| ya = yoloV3_analyzer(0.5) | |
| # analyze and show image | |
| image = cv2.imread(image_path) | |
| newImage = ya.ImageProcess(image) | |
| cv2.imshow("Rapid YoloV3 demo", newImage) | |
| # wrap up | |
| cv2.waitKey() | |
| cv2.destroyAllWindows() |
And the output is rocking, not only cats, also dogs and humans !
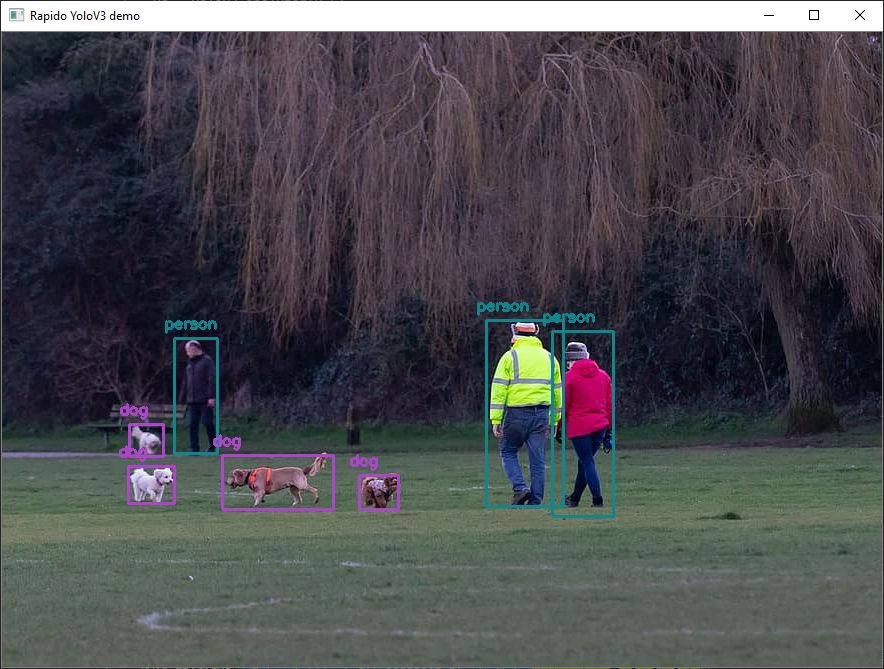
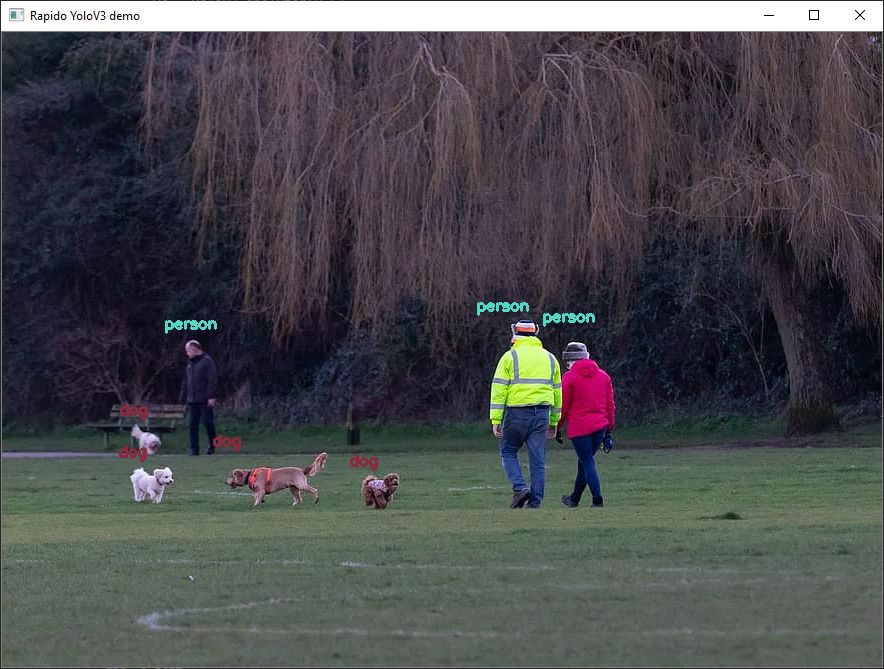
I added a couple of parameters to define if we want labels and bounding boxes in the output image. The same image without bounding boxes will be:
And finally, the main class to perform this. It’s a very simple one, and feel free to use it and remember that you must check the official YoloV3 repository to get the files:
- coco.names
- yolov3.cfg
- yolov3.weights
| # Bruno Capuano 2020 | |
| # performs object detection using YoloV3 in an image and return the processed image | |
| import imghdr | |
| import os | |
| import numpy as np | |
| import cv2 | |
| import time | |
| class yoloV3_analyzer: | |
| def __init__(self, confidence): | |
| self.confidence = confidence | |
| def InitYoloV3(self): | |
| #global net, ln, LABELS | |
| self.weights = "yolov3.weights" | |
| self.config = "yolov3.cfg" | |
| self.labelsPath = "coco.names" | |
| self.LABELS = open(self.labelsPath).read().strip().split("\n") | |
| self.COLORS = np.random.uniform(0, 255, size=(len(self.LABELS), 3)) | |
| self.net = cv2.dnn.readNetFromDarknet(self.config, self.weights) | |
| self.ln = self.net.getLayerNames() | |
| self.ln = [self.ln[i[0] – 1] for i in self.net.getUnconnectedOutLayers()] | |
| def ImageProcess(self, image, showLabels = True, showBoundingBox = True): | |
| # Init YOLO if needed | |
| if(self.net is None): | |
| self.InitYoloV3() | |
| (H, W) = image.shape[:2] | |
| frame = image.copy() | |
| blob = cv2.dnn.blobFromImage(frame, 1 / 255.0, (416, 416), swapRB=True, crop=False) | |
| self.net.setInput(blob) | |
| starttime = time.time() | |
| layerOutputs = self.net.forward(self.ln) | |
| stoptime = time.time() | |
| print("FPS: {:.4f}".format((stoptime-starttime))) | |
| confidences = [] | |
| outline = [] | |
| class_ids = [] | |
| for output in layerOutputs: | |
| for detection in output: | |
| scores = detection[5:] | |
| maxi_class = np.argmax(scores) | |
| confidence = scores[maxi_class] | |
| if confidence > self.confidence: | |
| box = detection[0:4] * np.array([W, H, W, H]) | |
| (centerX, centerY, width, height) = box.astype("int") | |
| x = int(centerX – (width / 2)) | |
| y = int(centerY – (height / 2)) | |
| outline.append([x, y, int(width), int(height)]) | |
| class_ids.append(maxi_class) | |
| confidences.append(float(confidence)) | |
| box_line = cv2.dnn.NMSBoxes(outline, confidences, 0.5, 0.3) | |
| if len(box_line) > 0: | |
| flat_box = box_line.flatten() | |
| pairs = [] | |
| for i in flat_box: | |
| (x, y) = (outline[i][0], outline[i][1]) | |
| (w, h) = (outline[i][2], outline[i][3]) | |
| x_plus_w = round(x+w) | |
| y_plus_h = round(y+h) | |
| label = str(self.LABELS[class_ids[i]]) | |
| color = self.COLORS[class_ids[i]] | |
| if (showBoundingBox == True): | |
| cv2.rectangle(frame, (x,y), (x_plus_w,y_plus_h), color, 2) | |
| if (showLabels == True): | |
| cv2.putText(frame, label, (x-10,y-10), cv2.FONT_HERSHEY_SIMPLEX, 0.5, color, 2) | |
| return frame | |
| # Yolo | |
| net = (None) | |
| ln = (None) | |
| LABELS = (None) | |
| frameno = 0 |
Happy coding!
Greetings
El Bruno
More posts in my blog ElBruno.com.
More info in https://beacons.ai/elbruno

Leave a comment